Soft Serve Direct
ROGER DAVIES MAGRATH, AB CANADA
  • Home
    • Twitter
    • Twitter Feed
  • inMagrath152
  • News
    • MagrathOpen Wifi
    • Pharmacy
  • Contact Us
    • Map
    • Phone
  • Search
  • Favorites
    • Magrath Chamber of Commerce
    • Magrath Lions Club
    • Magrath Museum

Lubuntu Success Story

16/4/2019

0 Comments

 
Recently installed Lubuntu 18.04 LTS on an old eMachine Windows Vista computer. It works great (now)! 

Yes there was a bit of a learning curve for me, but here's what worked .. and yes, it sounds a bit technical and skips some of the incremental step by step install notes .. but this is mostly for me to remind me just what ending up working ..
  1. Step 1 - Reloaded the Windows Vista to original 2009 specifications using the Windows Recovery Environment which had been preloaded on the eMachine hard drive (sda1) (computer was acquired from another family and no data was needed to be saved). Windows Vista system got 40GB drive c (sda2) leaving room for a small 4GB drive d (sda3) FAT32 transfer partition and 40GB (sda4) for the new Linux partition. I let windows update itself to Vista Service Pack 2, but since no modern browser is supported on Vista any longer and since the now defunct Internet Explorer (Vista) browser fails to load many current websites, I had to find an alternate method for software installs. Used a temp USB drive for this.  For example, ClamWin antivirus installed as a precaution, but had to download it on another system and copy the install exe program via USB drive to install.
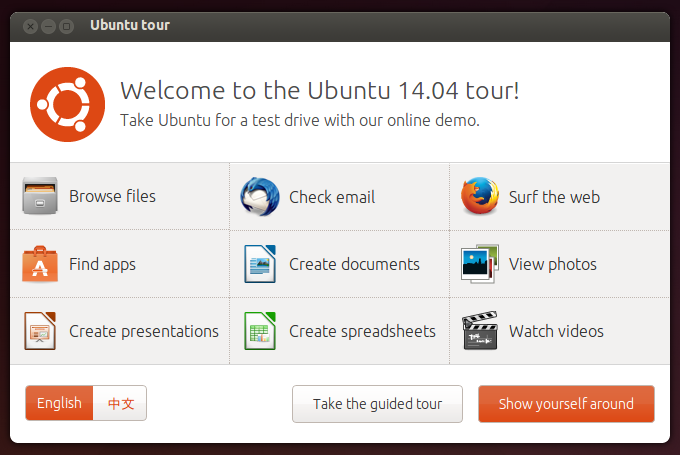
  2. Step 2 - Booting up the Linux install .. the old eMachine bios allows reading a USB disk but does not permit  booting from a USB drive, and I was too lazy to burn a CD (I have no blank burnable disks anymore anyways).  So since the normal USB LiveBoot install was not an option on this computer, we needed first a way to get started. I found a neat little program online called UNetbootin that allows creation of a bootable Live USB drive for Ubuntu and other Linux distributions without burning a CD. Also had to download it on another system and copy the windows install program via USB drive to install on the eMachine .. from https://unetbootin.github.io/.  Ended up downloading Lubuntu LTS version (a light version of Ubuntu designed to work on older computer systems) from https://lubuntu.net/downloads/ even though there are newer versions available, the Apr 2018 version is the most recent Long Term Support (LTS) version and is supported through to Apr 2021. It is also the one that worked the best .. So from Vista installed and ran the UNetbootin program and selected to boot from hard drive c using the downloaded LTS image. It created a new windows boot entry called UNetbootin that loaded the newly created LiveBoot version of Lubuntu .. Rebooted and selected the new entry and voila! the Lubuntu LiveBoot system was loaded up!
  3. Step 3 - Installing Lubuntu: just clicking the 'Install Lubuntu' icon at this point runs you through the install with just a few questions to answer - desired user name and password, keyboard and location options, etc. It's default installation operation was to erase the entire hard drive and replace with Linux .. but I wanted to keep the Vista for now as a dual boot option. So I selected 'Other methods' and created the 40GB sda4 partition formatted to ext4 with '/' as the mount point. Lubuntu then was installed there and a boot entry for the former Windows Recovery Environment and for Windows Vista itself in the new linux grub boot manager. I was connected to internet via Cat5 cable so selected option to download updates with the install and to include 3rd party software for movies/music etc. 
  4. Step 4 - rebooting now allows me to boot to Lubuntu (on this system aka Ubuntu). Yay! The default grub entry is the Ubuntu (Lubuntu) item.  Can also reboot to Windows Vista if desired. Once there (in Vista) running the UNetbootin program again allows you to simply uninstall the now unneeded UNetBootin windows boot entry it previously installed. Back in Lubuntu, the files from Vista are viewable and modern internet browsers and software can be installed.  The basic default programs are ones that have minimal footprint - Abiword (word processor), Gnumeric (spreadsheet), Firefox (browser), Sylpheed (email). I installed additional favorites - Libreoffice (word processing, spreadsheet, suite), Chrome (google browser), Homebank (financial), and some games. Online programs work well also - Youtube, Netflix, etc ..  Everything runs smoothly.
Addendum: Pleased to report that the install of printer drivers for the Epson Stylus ink jet NX420 was pretty much automatic. Printing and scanning worked as soon as it was plugged in and configured. Also needed to install a wireless wifi USB dongle - a DLink DWA-182. Just a little more involved install with first having to download the linux drivers from online site at https://support.dlink.com/ProductInfo.aspx?m=dwa-182 .. and then after downloading and extracting the driver files to a folder, I had to compile and install. Not too hard: First ran 'sudo apt install build-essentials' to install the necessary compiler program and then 'sudo sh ./install.sh' to run the provided script to do the compile and install .. and again, yay! Removed the wired cable and rebooted. The new wifi network card is also detected and usable.
0 Comments

This tip helped me access a broken Win10 hdd that was stuck in readonly mode ..

15/9/2018

0 Comments

 
How to remove 'Read-Only' error from hard drive/USB/SD card/external hard drive?If your storage device such as USB drive, SD card or external hard drive are write-protected now with 'Read Only' mark, don't worry. Here in the below, you'll find an effective method to remove write-protection and get rid of 'Read Only' error from your storage device ... 

Step A. Run CMD to remove 'Read Only' from hard disk/USB/SD card/external hard driveIt's quite simple to remove and fix storage device 'Read Only' error by applying CMD command. 
The only thing that you need to keep in mind is to be very careful while following the CMD guide steps to remove the ”Read Only” error from an SD card, USB drive, hard disk or external hard drive. 
  • Connect the ”Read Only” storage device such as an SD card, USB, external hard drive  to your PC
  • Open a Command Prompt by typing: command in the Search tab, click Command Prompt
  • Type: diskpart and hit Enter
  • Type: list disk and hit Enter
  • Type: select disk 0 and hit Enter (0 will be the drive letter of your read-only hard drive/USB/SD card, etc.)
  • Type: attributes disk clear readonly and hit Enter
  • Type: exit and hit Enter to finish the process
Step B: After this, your storage device will be accessible again and you will be able to read and use the saved data on your SD card, USB or external hard drive. If you still cannot access the saved data on your storage devices or have lost some saved files/documents, don't worry.
​
​source: easeus.com/storage-media-recovery/fix-read-only-error-on-hard-drive.html

0 Comments

RIP: XP survived by Ubuntu Linux

29/4/2014

0 Comments

 
Picture
After many years in intensive care, your venerable XP operating system was taken off life support this month by your friends at Microsoft.

Without XP support, many of you are left to ponder, what will become of my poor old computer? As further XP bugs are uncovered, as no further debugging or support will be provided by Mr Microsoft, and as those bugs are eventually exploited by nefarious malware or virus programmers, XP will simply die a slow death and/or eventually just become completely unusable.

What to do? For now, your system may keep plugging on, for a while. Microsoft is banking on you plunking down more money on a new Microsoft Windows product. I propose you consider moving to a free, open source option - Ubuntu Linux works for me!

Why?  Well, for one, the Ubuntu installation process is much simpler (and less costly .. can you beat free?) than the one for Windows version xyz. You enter a username and password and timezone and the easy installation automatically takes over and recognizes existing operating systems and gives you the option to install Linux without wiping any of the precious data sitting on your hard drive. Your computer hardware is also automatically detected and updated for you. The available software is open source - free to install and use on any number of computers  so no pack of M$ Lawyers will chase you down and make you track licences and installations. It allows you to do all the regular things that you would use in a Windows environment and more via familiar easy to use equivalent programs - Chrome or Firefox vs Internet Explorer, Libre Office vs Microsoft Office, GNU Cash vs Quickbooks, etc. In addition, all programs update with the operating system. Wow! I find that everything I plug in just works. and Ubuntu is much more secure than your poor old Windows systems. Being Linux-based I have yet to see a virus or malware show up on my systems. You don't need expensive and system numbing add-on antivirus solutions, but you can run one is you wish. Any problems that arise are patched right away for free by the Ubuntu developers. My biggest problem has been too much choice .. a myriad of possible favorite software programs to try and use.

You can even just run the LiveCD option to try out Linux on your computer without even installing a thing on your hard drive. Very useful in getting started with Ubuntu or for even for fixing a 'broken XP' system. You can update your system every 6 months to keep on the bleeding edge, or stick with the LTS (Long Term Support) versions that are supported for 5 years! A new LTS version is released every 2 years. There is no extra fee for the LTS version and upgrades to new versions of Ubuntu are and always will be free of charge.

Being ever so customizable, the system can be configured to look and act like your old Windows system, if you cannot live without a start button. You can even install Windows emulation (called Wine). Wine allows you to run many Windows programs on Linux - including Netflix, RootsMagic, Picasa, and Family Search Indexing .. some of my favorites.

Picture
http://www.ubuntu.com/tour/en/
Need help? Although it is pretty easy install and get started with Ubuntu, you can also find tons of help online. For example, Mr Robbie Ferguson of Category5.tv has a weekly free tech support show - 1 hour long every Tue evening. You can view past viewer questions and answers or submit your own questions for consideration by phone or video or email. Many enthusiasts, like myself, post tips and helps online to keep you informed and edu-ma-cated. 

Need more help? Of course, you can always hire me (or someone very much like me - if you don't live close by) to set you up, get you started and keep you going. Call me ..
0 Comments

Shared network folder setups (Linux)

14/10/2013

0 Comments

 
Howto: Shared network folder setups – Nov 2013 [email protected]

Here is one way to mount a folder on another computer (using Linux eg Mint or Ubuntu):

First, you need to know the IP addresses of the computers .. however, remember that unless they are static, these numbers may change from time to time ..  on each computer, from a terminal window, you can type:

ifconfig 

to list the 'inet addr' for that computer. For example on my laptop it shows inet addr:192.168.2.22 in the wlan0 section ..
also, in Linux Mint cifs-utils is installed by default, but if not, it can be installed or verified from the  terminal as well with the command:

sudo apt-get install cifs-utils

(if it was already installed, you just get a nice message to that effect).
now, moving on ..  on the computer you want access from, set up the sharing options.

In Ubuntu with Nautilus, you can just right-click on the folder and select 'Sharing Options'. With Mint and the Thunar file manager that option is missing, but you can accomplish these tasks from the command line .. something like this:

net usershare delete ShareDocs
net usershare add ShareDocs /home/user/Documents ”” Everyone:F guest_ok=y
net usershare info --long


(which removes a share, shares your folder at /home/user/Documents with share name of your choice, in this case, 'ShareDocs' to Everyone with Full access, and lists the results)
next, you will want to create a folder (mount point) for the share on the other computer, the one you want to share to:

sudo mkdir /media/shared

(current Ubuntu distributions like to use the /media folder for this sort of thing instead of /mnt .. which is standard used by older/other Linux distros .. but it's fine to use either) and  finally, use a command like this to mount the share:

sudo mount.cifs //192.168.2.22/ShareDocs /media/shared -o user=USERNAME
 
Remember to replace USERNAME with the username for the Samba server that you need to log in as. You'll be prompted for your password. You can specify your password on the command-line too (with -o password=PASSWORD) but it will appear in cleartext in the Terminal and will go into your command history, so you probably don't want to do that. So, if all went well so far,  the folder on the other computer linked to the share name ShareDocs will now be linked to this computer in the /media/shared folder .. you'll find the newly shared directory listed in your files manager files (sweet!) but only until you reboot your computer. To automate the connection, you have to insert the mount command into your fstab file .. or repeat the steps above each time you want to access the files ..

and for that .. see more how to at wiki.ubuntu.com/MountWindowsSharesPermanently
0 Comments

    Author

    Roger Davies of ssdirect.com

    Archives

    March 2024
    July 2023
    May 2023
    April 2023
    March 2023
    January 2022
    March 2020
    January 2020
    December 2019
    November 2019
    April 2019
    March 2019
    January 2019
    September 2018
    April 2018
    January 2018
    July 2017
    October 2016
    September 2016
    December 2015
    October 2015
    September 2015
    June 2015
    May 2015
    December 2014
    November 2014
    October 2014
    May 2014
    April 2014
    March 2014
    October 2013
    April 2013
    March 2013
    February 2013
    June 2012
    May 2012
    April 2012
    February 2012
    January 2012
    November 2011
    October 2011
    May 2011
    April 2011
    March 2011
    February 2011
    November 2010
    September 2009
    November 2008
    February 2007

    Categories

    All
    Accounting
    Email
    Family Safe
    Hardware
    Internet
    Linux
    Software
    Wifi

    RSS Feed

Powered by Create your own unique website with customizable templates.